Last updated on
Learn how to frame a tiny house on a trailer because getting it right can significantly enhance your mobile living experience.
Tiny houses on trailers add a mobile and sustainable touch to your lifestyle. Framing your own tiny house on a trailer might seem daunting, but with the right guidance, it’s a satisfying task you can successfully undertake.
This article will guide you through the essential steps of framing, from planning your structure, choosing your materials, to the actual framing process. From installing your base plate to adding your top plate, you’ll find a detailed and informative walkthrough here, catering expressly to this convenient and exciting housing alternative.
Key takeaways:
- Use pressure-treated and dimensional lumber for framing.
- Consider scale, weight, and strength in framing design.
- Choose materials that are durable and lightweight.
- Optimize for simplicity and efficiency in framing.
- Ensure proper insulation and space for electrical and plumbing systems.
Materials and Tools You Need

Embarking on framing your tiny house, you’ll require specific tools and materials to ensure durability and precision. Essential materials include pressure-treated lumber for the subfloor, dimensional lumber for the walls and roof, structural sheathing panels, and for securing everything, a selection of nails and screws. The roof may demand specially treated lumber designed for outdoor exposure.
Precise measurements and cuts are crucial, which is where high-quality tools play a role. A circular saw, power drill, and nail gun will expedite the construction process. You’ll also need a level, tape measure, and speed square for accurate alignment and measurement. Safety gear is non-negotiable; durable gloves, safety glasses, and a hard hat will protect from potential injuries.
Select materials with not only durability but also weight in mind, since the overall weight impacts the mobility and structural integrity of your tiny house. In summary, choose quality over quantity and be mindful of the tools that can make the process efficient and safer.
Tiny House Framing Basics

Before you start working with any lumber or power tools, understanding the core components of tiny house framing is crucial for creating a durable and safe living space. Here’s what you need to keep in mind:
1. Scale and Proportion: Due to the limited square footage, each decision in the framing process impacts usability and comfort. Carefully consider dimensions to maximize space.
2. Weight Factor: The frame must support not only the structure’s weight but also fixtures, belongings, and inhabitants. Opt for strong yet lightweight materials.
3. Strength and Rigidity: Tiny homes encounter various stresses, especially when mobile. Reinforce joints and intersections to withstand vibrations and movement.
4. Material Choices: Commonly, wood is used for its strength-to-weight ratio, ease of work, and insulation properties. Metal can provide a lighter alternative, although it usually requires more specialized tools and skills.
5. Simplicity and Efficiency: Aim for a design that minimizes complex cuts and material waste. Efficiency in the framing stage saves time and resources.
6. Insulation Space: Account for sufficient cavity spaces within walls, floor, and roof to incorporate insulation that meets your climate’s needs.
7. Electrical and Plumbing Systems: Integrate spaces for these systems into your framing design to avoid complications during installation.
8. Safety Standards: Know and adhere to building codes and safety standards, even if they don’t strictly apply to tiny houses on trailers. Safety should never be compromised.
9. Adaptability: Leave room for future modifications or expansions in your frame design, which can add long-term value and functionality to your tiny house.
Remember, solid planning and precision during the framing phase lay the groundwork for the entire build of your tiny house on a trailer.
Choosing the Right Trailer
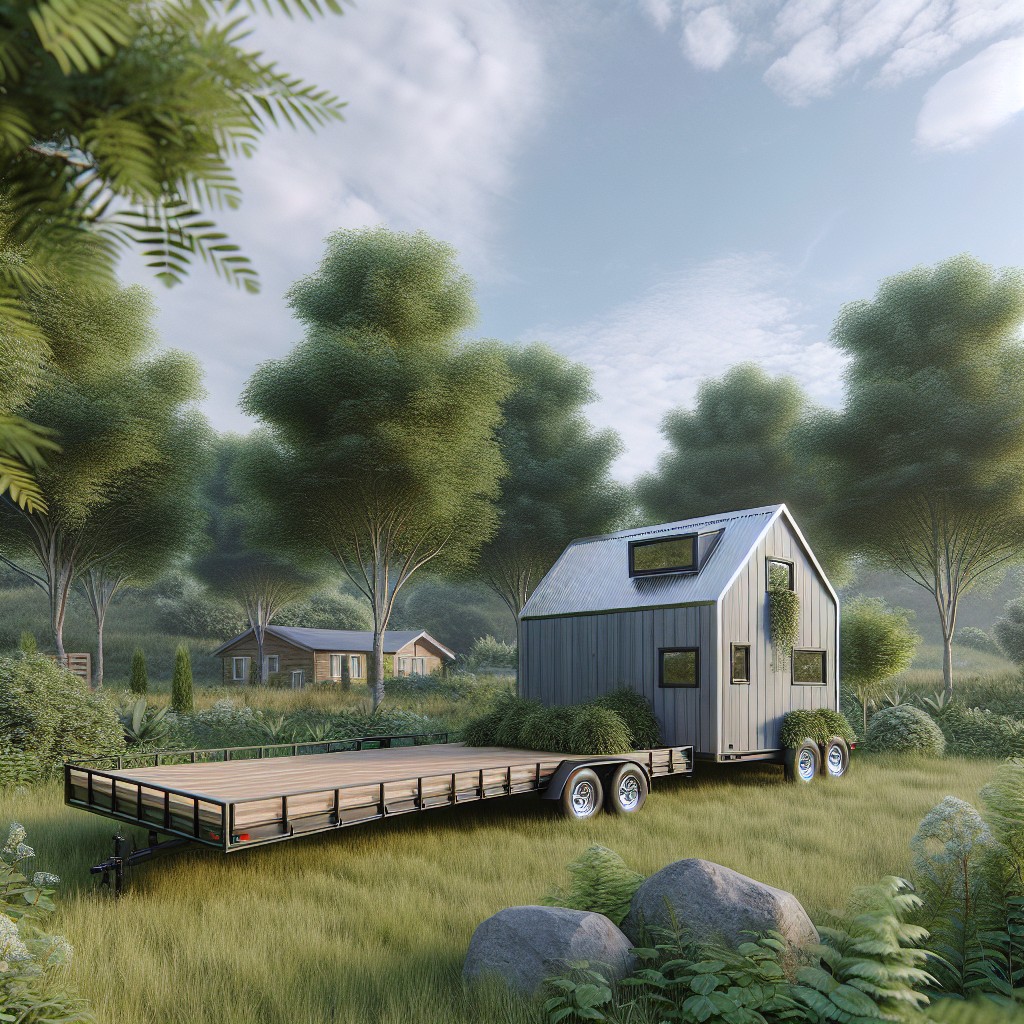
Selecting an appropriate base is critical as it dictates the footprint and weight capacity of your home. Opt for a flatbed or a specific tiny house trailer with a declared Gross Vehicle Weight Rating (GVWR) that exceeds your estimated total weight.
Ensure it offers enough length and width to accommodate your design. Dual axle trailers provide better stability and weight distribution than single axles, which is vital when towing. It’s also beneficial if the trailer comes with brakes, essential for safe transportation.
Check the condition of the chassis and underlying structure for rust or damage, as repairs can be costly and impact structural integrity. Consider trailers with a removable tongue to maximize space, and look for integrated utility channels for seamless integration of plumbing and electrical systems.
Always verify documentation to ensure legality for road use.
Assessing Trailer Condition

Before you start building, closely inspect the trailer to ensure it’s structurally sound and suitable for your tiny house. Look for signs of rust or corrosion, particularly in the main beams and joints, as these are red flags for potential weakness. Verify that the trailer’s flatbed is straight and level; any warping could lead to issues with your build.
Check the condition of the wheels and suspension. They should be in good working order to handle the weight of a tiny house. The brake and lighting systems must be functional for safety during transport.
Don’t overlook the manufacturer’s plate, which indicates the Gross Vehicle Weight Rating (GVWR). This figure is critical — it tells you the maximum weight your trailer can safely handle, and your tiny house design should align with this limitation.
Lastly, measure the dimensions of your trailer to guide your design decisions, as staying within the confines of the trailer is crucial to avoid legal and practical transport issues down the line.
Designing the Tiny House Layout
When sketching your layout, consider the flow of movement and the function of each space. Optimize for efficiency by placing commonly used zones like the kitchen and bathroom close to each other, allowing for easier plumbing installations. Remember to account for wheel wells if they intrude into your living space, as this can affect furniture placement and storage solutions.
Factor in the weight distribution when planning your layout. Heavier items such as appliances, built-in furniture, and storage should be evenly dispersed to maintain balance while the house is on the move. Also, bear in mind the towing capacity of your vehicle, as this will influence the overall weight of your tiny house.
Make sure to allocate adequate space for insulation and wiring within your design, which are crucial for comfort and functionality, respectively. Lastly, emphasize natural light by strategically placing windows, enhancing the sense of space and reducing the need for artificial lighting during the day.
Framing the Subfloor
Begin by laying out your floor joists across the width of the trailer, securing them at the correct intervals, typically 16 to 24 inches on center, which provides a balance between strength and material efficiency. Ensure each joist is level and square with the trailer frame.
Next, attach a rim joist along the perimeter to tie the floor joists together, creating a solid frame. This strengthens the overall structure and provides a nailing surface for the subfloor sheeting.
Subfloor sheeting, usually made from plywood or OSB, is then affixed on top of the joists using screws, as they provide more secure and less squeaky floors compared to nails. These sheets should be staggered so that their seams do not line up, adding to the subfloor’s rigidity.
It’s also essential to leave a small gap (about 1/8 inch) between sheets to account for expansion and contraction due to temperature changes. This gap can be easily achieved by using a nail as a spacer while installing the sheets.
Lastly, consider applying a protective coating or building wrap over the subfloor to serve as a moisture barrier, safeguarding your home’s foundation from potential water damage. This is particularly important in a tiny house on a trailer, where road spray might be a concern.
Attaching the Subfloor to the Trailer
Begin by ensuring the trailer is level before attaching your subfloor; this affects the entire build process. Place your prefabricated or site-built subfloor frame onto the trailer, checking for alignment with the trailer edges.
Secure the subfloor to the trailer using heavy-duty bolts. The size and spacing of these bolts should comply with local building codes and ensure structural integrity. Typically, bolts should be placed every 16 to 24 inches apart.
Drill holes through the subfloor frame and into the trailer’s metal frame. Insert bolts, add washers and nuts, and tighten firmly. This creates a strong bond that helps prevent the house from shifting during transport.
Where necessary, use metal brackets or hurricane ties to reinforce connections, especially on corners and at stress points. Always double-check for squareness after each section is secured to avoid future issues with your tiny house structure.
Remember to consider utility runs at this stage; plan for and execute any grooves or conduits necessary for electrical, plumbing, or gas lines, ensuring they are not compromised when the subfloor is secured.
Last but not least, weatherproof the attachment points. Apply sealant around bolt entries to prevent water ingress, which could lead to corrosion or rot over time. This step is crucial for the longevity and durability of your tiny house on a trailer.
Building Your Tiny House Wall
Walls are essential for both the structure and insulation of your tiny house. To begin construction, cut your lumber to the specific dimensions needed for your design’s wall frames. It’s important to start with the front and back walls before moving onto the side walls.
Mark your top and bottom plates for stud locations, typically 16 inches on center, which is a standard spacing for wall studs. Assemble each wall on a flat surface, laying out the studs between the plates, and secure them with framing nails or screws.
Install headers above door and window openings to provide support and distribute loads. These can be built from doubled-up 2x4s or larger lumber, depending on the span and weight load.
Double-check that each wall is square by measuring diagonally from corner to corner. Adjustments should be made before walls are finalized.
Use temporary bracing to hold walls upright once raised into position. This provides stability as you attach the walls to the subfloor and each other.
Incorporate blocking between studs for added structural strength and a nailing surface for interior finishes. This step also helps prevent thermal bridging, improving your tiny house’s energy efficiency.
Remember to account for the sheathing that will cover the walls when measuring and cutting lumber, ensuring a tight and seamless fit for weatherproofing and insulation purposes.
Raising Your Tiny House Walls
Once wall frames are assembled, the process of making your tiny house start to resemble a home begins. To raise the walls:
1. Preparation: Ensure that the subfloor is level. Clean the area of any tools or materials to avoid tripping hazards.
2. Bracing: Cut temporary braces from scrap lumber before lifting the walls. These will stabilize the structure during installation.
3. Lifting: With a team, lift the first wall into place. It’s advisable to start with the longest wall. Use lifting straps for safety and to help distribute the weight.
4. Alignment: Check that the bottom plate of the wall aligns precisely with the edge of the subfloor for a snug fit.
5. Anchoring: Secure the bottom plate to the trailer with appropriate fasteners, normally lag bolts or heavy-duty screws.
6. Plumbing the Wall: Use a level to ensure the wall is perfectly vertical (plumb) before attaching the temporary braces to hold it upright.
7. Joining Corners: When adjoining walls are raised, ensure corner studs match up accurately and secure them together. This increases the overall rigidity of the structure.
8. Double Check: After all walls are up and braced, re-check each wall for plumb and adjust as necessary before proceeding with permanent sheathing or further construction.
Using these steps, the outline of your tiny house will quickly take shape, laying a strong foundation for the next phases of your build.
Securing Walls to the Subfloor and Each Other
Once the walls are assembled, it’s crucial to anchor them securely to ensure stability and safety. Begin by positioning each wall on the subfloor according to your design, checking for plumb with a level. Use heavy-duty bolts or lag screws at designated intervals to fasten the bottom plates of your walls to the subfloor, penetrating both the plates and the trailer frame. This creates a solid foundation resistant to movement during travel.
For corners, ensure a tight fit between walls, using clamps if necessary. Corner posts often serve as a nailing point for both adjoining walls, adding strength. To join walls to each other, use metal plates or plywood sheathing, which can be nailed or screwed over the joint where two walls meet, effectively uniting them. This technique reinforces the connection, distributing pressure evenly and offering additional support against lateral forces. Remember to keep wall intersections flush and square for a seamless exterior finish and interior fitting of cabinetry and finishes later on.
Wall Sheathing Installation
Wall sheathing adds strength and rigidity to your tiny house structure and forms a crucial base for your weather-resistant barriers. To ensure effective installation:
1. Select sheathing material: Plywood or oriented strand board (OSB) are popular choices due to their durability and cost-effectiveness.
2. Measure and cut: Precisely measure your walls and cut the sheathing to fit. Remember to subtract the spaces for windows and doors.
3. Horizontal or vertical: You can install sheathing either horizontally or vertically. Vertical installation can provide a smoother surface for siding, but horizontal installation may offer greater structural support.
4. Stagger seams: When laying out the sheathing, stagger the seams for added structural integrity. This prevents long vertical or horizontal seam lines that could compromise the wall’s strength.
5. Leave a gap: Tiny houses move slightly during travel. Leaving a 1/8-inch gap between sheathing panels allows for expansion and contraction.
6. Nailing pattern: Follow a nailing pattern recommended by local building codes or sheathing manufacturers, usually 6 inches along the edges and 12 inches in the field (center of the panel).
7. Wrap and protect: After sheathing, wrap your tiny house with a weather-resistant barrier to shield it from moisture.
By adhering to these points, you lay a solid foundation for the next steps in your tiny house build, ensuring a durable and secure home.
Roof Framing For A Tiny House
Once your walls are securely in place, it’s time to focus on the roof, an essential component for protecting your tiny home from the elements. Precision and planning are key for a sturdy and leak-proof roof. Start by deciding on the roof style—gable, shed, or another design—which will influence aesthetics and the interior loft space.
Begin constructing the roof by installing the ridge beam at the peak, which acts as the backbone of the roof structure. Rafters or trusses are then cut to fit and connect the ridge beam to the top plates of the walls. The choice between rafters and trusses depends on your design and skill level; trusses offer more stability but are less customizable.
Add collar ties or rafter ties, if using rafters, to prevent the walls from spreading apart under the weight of the roof. For proper load distribution, ensure that each rafter is directly above a wall stud. Hurricane ties are also recommended to reinforce the connection between rafters or trusses and the wall plates, increasing resilience against high winds.
Once the framing is complete, sheath the roof with plywood or OSB panels, starting from the bottom edge and working toward the ridge. Cover seams with weatherproof tape to enhance moisture resistance. Lastly, install underlayment and your chosen roofing material, following manufacturer recommendations for a lasting finish.
Keep in mind that the roof angle must accommodate your climate, particularly for efficient snow and rain run-off. Moreover, ensure that all materials and the overall design conform to road height regulations if you plan to travel with your tiny home.
Roof Sheathing Techniques
Securely installing roof sheathing is critical for the integrity of your tiny house structure. Begin by selecting a suitable material for your sheathing; typically, plywood or oriented strand board (OSB) are durable and reliable choices. When cutting your sheathing, precision is key; ensure panels fit tightly together without overlapping.
Start from the lower edge of the roof and work your way up, allowing the sheathing panels to hang over the edge slightly to form an eave overhang. This overhang is important for water runoff and protecting your siding. Use a staggered pattern to lay the sheets; it improves the roof’s overall strength and prevents seams from lining up in a straight row, which can be a weak spot.
Fasten each panel with nails or screws, following local building codes for spacing and size. Typically, fastening occurs at 6-inch intervals along the edges and 12-inch intervals in the center of the panel.
Add a drip edge along the eaves before laying down the underlayment and shingles or other roofing materials. This metal flashing helps direct water away from the deck, preventing damage.
Always prioritize safety when working on a roof; wear a harness, and ensure proper footing and stability. The sheathing is not only the base for your roofing material, but it’s also a critical component in tying the roof structure together, adding rigidity and support to the frame.
Installing Windows and Doors
Once the walls are up and sheathed, it’s time to carve out spaces for windows and doors, which are vital for light, ventilation, and access. Measure and cut openings carefully, adhering to the dimensions in your design plans, to ensure a snug fit for these elements.
Before installing windows, wrap the opening with a waterproof membrane to prevent water ingress. Use shims to level the window within the opening, then secure it with screws through the side jambs. Apply caulking around the exterior to seal against weather.
For doors, place a sill pan at the bottom to divert water. Position the pre-hung door into the rough opening, ensuring it’s plumb and level. You might need temporary supports to hold the door frame in place as you fasten it with long screws through the framing members.
Both windows and doors should open and close smoothly without binding. Inspect the installation from the inside and outside to guarantee that they’re flush with the wall exterior, and apply trim or flashing as needed for a finished appearance and additional weatherproofing. With precision, you ensure the integrity, efficiency, and longevity of your tiny house.
Framing Your Loft In A Tiny House
Loft framing in a tiny house utilizes vertical space to create an additional living or sleeping area. Here are some key points to keep in mind:
1. Height Considerations: Ensure the loft height allows for comfortable movement without compromising the space below. Account for the thickness of your mattress and any headroom you desire.
2. Support Structure: Use sturdy beams, typically 2×6 or 2×8 lumber, to support the loft’s weight. These can be integrated into the wall framing for added strength.
3. Joist Spacing: Maintain proper joist spacing, typically 16 inches on center, to support your flooring material and live loads.
4. Cross-Bracing: Incorporate cross-bracing between joists for stability and to prevent twisting.
5. Flooring Material: Choose a durable yet lightweight flooring material to reduce the loft’s overall weight. Plywood or tongue-and-groove boards are common choices.
6. Access Solutions: Plan for a ladder or staircase that provides safe and easy access. Remember to account for this in your tiny house layout.
7. Railings: Install secure railings around the loft’s perimeter to ensure safety. Verify your design meets local building codes if applicable.
8. Utility Runs: Consider the placement of electrical wiring or HVAC components. Use the space between joists to run necessary utilities to the loft area.
By incorporating these strategies, you’ll establish a functional and secure loft space to maximize the usability of your tiny house.
Advanced Framing Techniques for Tiny Houses
Advanced framing, also known as optimum value engineering (OVE), minimizes waste and maximizes energy efficiency. Here are the key points:
1. Two-stud Corners: This technique reduces lumber use and provides more space for insulation by using only two studs at the corners of the wall framing.
2. Insulated Headers: Only install headers over windows and doors where structural support is necessary. When you do, ensure they are insulated to improve thermal performance.
3. Ladder Blocking: For the junction between interior and exterior walls, use ladder blocking, which is a horizontal piece that allows for more insulation and less thermal bridging than traditional framing.
4. 24-Inch On-Center Framing: Spacing studs further apart, typically 24 inches rather than the standard 16 inches, decreases the amount of material used and increases the wall cavity size for insulation.
5. Single Top Plate: Reducing the top plate from a double to a single, wherever possible, saves on lumber while maintaining structural integrity if the walls are carefully aligned with the rafters and floor joists above and below.
6. Right-sized HVAC Systems: After reducing the home’s heating and cooling load through advanced framing, select appropriately sized HVAC units to maximize energy efficiency and comfort.
7. Protect Against Moisture: With advanced framing creating a tighter envelope, proper moisture management becomes crucial. Incorporate a well-planned water-resistant barrier and ensure adequate ventilation to prevent condensation issues.
By intelligently adopting these advanced framing methods, tiny houses not only reduce material costs but also achieve a higher level of energy efficiency.
Determining Proper Insulation
Insulation is key to maintaining a comfortable climate within your tiny home and ensuring energy efficiency. The type and amount needed depend on several factors including your geographic location, desired internal temperatures, and the seasons you plan to inhabit the space.
R-Value Recommendations: Consider the recommended ‘R-value’ for your region—an indicator of the insulation’s thermal resistance. The higher the R-value, the better its insulative properties.
Spray Foam: Excellent for tight spaces in tiny houses, spray foam expands to fill gaps, providing a high R-value per inch while also contributing to the structural rigidity of the house.
Rigid Foam Boards: Offering a moderate R-value, they are easy to install and ideal for floors and flat surfaces.
Fiberglass and Wool Batts: Traditional materials that are cost-effective and come in standard sizes to fit between framing members, though they require careful installation to avoid gaps that reduce efficiency.
Minimizing Thermal Bridging: Frame the house with thermal breaks—sections of non-conductive material that prevent heat transfer through the studs, which can account for significant heat loss.
Insulating Windows and Doors: Opt for double or triple-pane windows and well-sealed doors to complement your insulation efforts.
Ventilation: Maintain indoor air quality and moisture levels by incorporating an appropriate ventilation system. Correct insulation will keep the structure warm, but without ventilation, condensation can lead to mold growth.
Keep these points in mind to match your insulation strategy with the specific needs and conditions of your tiny house living.
Tiny House Exterior Siding Choices
When selecting exterior siding for your tiny house, consider durability, weight, maintenance, aesthetics, and overall cost. Here are some popular siding options:
- Wood Siding: Classic and customizable, it offers a range of styles including cedar shingles, clapboard, and board-and-batten. Wood requires regular maintenance but provides a timeless look.
- Metal Siding: Ideal for a modern aesthetic, metal siding like aluminum or steel is durable and low-maintenance. It’s also excellent for weather resistance and can be a lighter-weight option.
- Vinyl Siding: A budget-friendly choice known for its wide variety of colors and ease of installation. It doesn’t need painting and can withstand various elements, though it may not be as eco-friendly.
- Fiber Cement Siding: A blend of wood fibers, sand, and cement, it mimics the look of wood or stone. This siding is fire-resistant, termite-proof, and can handle extreme weather conditions.
- Composite Siding: Made from recycled materials, it’s an eco-conscious choice that requires minimal upkeep. It’s designed to resist moisture and fend off insects without sacrificing the home’s curb appeal.
Each option has its pros and cons regarding installation complexity, impact on total weight, and thermal performance. Be sure to weigh these factors in light of your specific needs and the conditions where your tiny house will travel or be located.
Understanding and Calculating GVWR
Gross Vehicle Weight Rating (GVWR) is the maximum safe weight your trailer can handle, which includes the weight of the trailer itself plus its load. Calculating it correctly is essential for safety and legal compliance.
– First, find the GVWR specified by the trailer manufacturer; it’s often listed on a plaque or in the documentation.
– The weight of the trailer (tare weight) and the weight of your completed tiny house (including belongings and residents) should not exceed the GVWR.
– To estimate your tiny house’s weight, add the weight of all building materials, fixtures, and contents. Tools like online materials calculators can offer a helpful starting point.
– Remember to factor in the weight of water tanks if they’ll be full during transit.
– Account for the weight distribution on the trailer to maintain balance and prevent strain on the towing vehicle.
– Regularly weigh your tiny house during the build process, using truck scales to stay within safe limits.
– If your design approaches the GVWR limit, consider using lighter materials or modifying your design to reduce weight.
Adherence to GVWR ensures your tiny house remains mobile and avoids potential hazards on the road.
Troubleshooting Common Framing Issues
During the framing process, you might encounter a few hiccups along the way. Understanding how to address common issues ensures your build remains on track.
Warping or Twisting: When lumber warps or twists, structural integrity can suffer. Counter this by thoroughly inspecting wood before purchase and using it soon after. If you notice warping during the build, replacing the affected pieces is typically your best bet.
Misalignment: Precision is key. Should you find that your wall frames don’t line up perfectly with the subfloor, re-measure and adjust your layout lines. Occasionally loosening and then re-tightening bolts can allow for slight adjustments.
Over or Under Cutting: Make sure your measurements are exact before cutting. It’s a common adage – measure twice, cut once – but it holds true. If you make a mistake, it’s often necessary to replace the lumber rather than attempting a fix.
Improperly Secured Walls: Walls need to be firmly attached to withstand wind and movement. If walls aren’t secure, add additional fastening points or brackets. Ensure all connections are tight and use locking nuts where applicable.
Uneven Roof Lines: For an even roof, rafters must be cut identically. Utilize a single template for all cuts to maintain uniformity. Check the evenness as you progress with a level.
Deal with issues as they arise to maintain the integrity of your build, and prevent small problems from evolving into larger ones in your tiny house project.
FAQ
Can you build a tiny house on a trailer frame?
Yes, you can build a tiny house on a trailer frame, making it a mobile and flexible housing solution.
How much does it cost to build a tiny house on a trailer?
The cost of building a tiny house on a trailer can range from $6,000 for a basic cabin kit to over $100,000 for a custom-built home with unique features.
What is the best framing for a tiny house?
The best framing for a tiny house is light steel framing due to its quality and advanced features.
What materials are best suited for a tiny house built on a trailer?
Lightweight yet durable materials like framed wood, aluminum or steel, and SIPs (Structural Insulated Panels) are best for constructing a tiny house on a trailer.
Is there a specific trailer size required for constructing a tiny house?
No, there is no specific trailer size required for constructing a tiny house as it primarily depends on personal needs and local regulations.
How does the process of insulating a tiny house on a trailer differ from a traditional house?
Insulating a tiny house on a trailer differs from a traditional house as it typically involves the use of lighter, compact materials like spray foam insulation that can withstand the vibrations and movement during travel, and needs to be more thorough to prevent heat loss due to the smaller size and higher exposure to outdoor climate.
Want More?
 40 Luxury Dream Houses That Will Transform Your Life
 20 Modern House Front Gate Design Ideas for Ultimate Curb Appeal
 20 Stylish Modern House Entrance Door Ideas
 20 Brilliant Ideas for Modern House Elevation Design
 20 Ideas: Modern House Entrance
Table of Contents