Last updated on
Learn how to build a yurt house because it’s a unique, eco-friendly dwelling that reinvents conventional living space.
Building a yurt home, a traditional circular dwelling with its roots in Central Asia, is an innovative and sustainable way to create a living space closer to nature. This guide is a treasure trove for those aiming to construct a yurt, detailing the essentials from choosing appropriate materials to the phased building process.
It covers not only the basics but also tips on making your yurt energy-efficient and sustainable. So sally forth, as it unveils secrets of yurt building that combine traditional wisdom with modern sustainability techniques, all amalgamated to make your yurt-house building project a soaring success.
Key takeaways:
- Choose an ideal site for your yurt house
- Acquire the necessary permits for construction
- Select a high-quality yurt kit that meets your needs
- Prepare the ground and construct a solid platform
- Assemble the lattice wall structure and set up the door frame
Choosing the Perfect Site for Your Yurt

Selecting an ideal location is crucial. Opt for a spot with natural shelter from wind. You don’t want to be in a direct path of harsh weather. However, ensure that the site is open enough to receive sunlight, which will be beneficial for warmth and preventing mold and mildew.
Pay attention to the ground. A slight elevation is desirable for water drainage, a critical aspect to avoid flooding. The area should also be accessible for transporting your yurt kit and materials, as well as for future services such as water, electricity, and sewer.
Consider the orientation. Position the yurt’s door facing away from prevailing winds and towards the most pleasant views. Moreover, the door should be easily reachable from a road or path for convenience.
Remember the local flora and fauna. Be aware of whether your yurt will impact any natural habitats or if local wildlife might pose a risk to your new abode. Balancing harmony with nature and your living comfort is key.
Acquiring the Necessary Permits
Before you embark on building your yurt, it’s crucial to understand the legal landscape. Depending on location, you might need a variety of permits to ensure your dwelling complies with local zoning, building, and land-use regulations.
Start by:
- Visiting your local planning department to clarify the need for permits.
- Understanding the specific codes concerning alternative structures like yurts.
- Submitting detailed plans, if required, which may include the yurt’s dimensions, intended use, and site plan.
- Checking if there are any environmental assessments necessary for your chosen site.
- Anticipating the timeframe for permit approvals to align with your building schedule.
Taking these proactive steps will provide a clear path forward, preventing any legal hurdles that could disrupt or delay your project.
Selecting a Yurt Kit
When you’re in the market for a yurt kit, there are several factors to consider to ensure you choose the best option for your needs:
1. Material Quality: Look for durability in the wooden lattice and door, and UV-resistant, waterproof fabrics for the covering.
2. Size: Match the diameter of the kit to your spatial requirements; commonly, yurts range from 12 to 30 feet.
3. Customization: Some kits offer customizable features such as additional windows, insulation packages, and upgraded doors.
4. Manufacturer Reputation: Opt for companies with strong customer service, positive reviews, and a history of satisfied yurt owners.
5. Inclusivity of Kit: Verify whether the kit contains all necessary components, like the roof ring and tension cable.
6. Price: Align your choice with your budget while considering long-term durability over initial savings.
7. Assembly Support: Check if the supplier provides detailed instructions, assembly support, or even video tutorials.
8. Shipping and Handling: Account for shipping costs and ensure the supplier can deliver to your chosen location.
Assess each kit with these points in mind to streamline your decision-making process and move closer to making your yurt dream a reality.
Preparing the Ground

Before laying the foundation for your yurt, it’s crucial to ensure the ground is level to prevent structural issues. Begin by removing any sod and clear debris from the area. Employ a long level or laser level to check the evenness of the site, making adjustments as needed by adding or removing soil.
Compaction of the soil is the next step, enhancing stability. You can achieve this through manual tamping or with machinery for larger areas.
For drainage, grade the land so that it slopes slightly away from where your yurt will sit. This helps to avert water accumulation under your structure which can lead to damp issues.
Finally, consider the type of foundation that suits your yurt and environmental conditions best. Whether it’s a simple eco-friendly gravel bed, a wooden platform, or a concrete slab, this base will protect your yurt from moisture and extend its lifespan.
Constructing the Platform
Building a solid foundation is crucial for the stability and longevity of your yurt. The circular platform, typically made from wood, not only anchors your structure but also keeps it level and dry.
Here are key steps to guide you through the process:
- Measure and mark the circumference of your yurt on the ground to define your platform’s outline.
- Clear the area of debris and level the ground where your platform will sit.
- Construct your frame using weather-resistant lumber, ensuring cross-joists are evenly spaced for support.
- Secure the frame to the ground with concrete piers or ground anchors depending on soil conditions.
- Install the subflooring, preferably from tongue-and-groove plywood, for a seamless and sturdy base.
- Treat the wood with preservatives to defend against moisture and decay.
- If desired, add insulation beneath the flooring to enhance thermal efficiency.
Each step ensures the platform not only supports the weight of your yurt but also contributes to its comfort and durability.
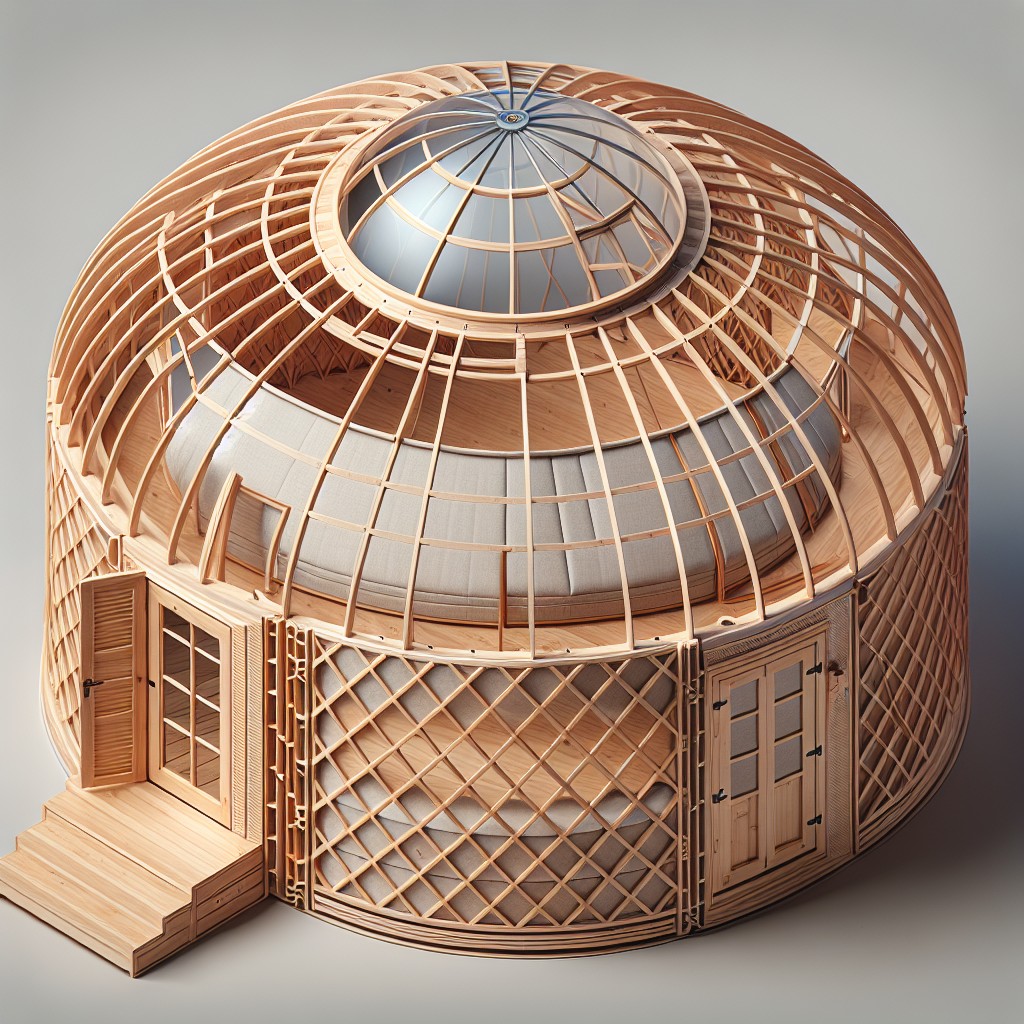
Assembling the Lattice Wall Structure
Begin by laying out the lattice sections at your chosen location, ensuring they align with the platform’s perimeter. Typically made of crisscrossed wooden slats, these lattice pieces are designed to expand like an accordion, providing structural support and flexibility.
Connect each lattice section according to the manufacturer’s guidelines, usually involving metal pins or ties. Ensure the joints are secure, as they will have to support the weight of the roof.
Once joined, the lattice structure should form a circle around the platform’s edge. Check for even spacing between the lattice sections; this consistency is vital for attaching the roof rafters later.
Position the door frame at the designated opening, anchoring it firmly to both the lattice wall and the platform. It serves as an additional support and entry point for your yurt.
Ensure that the entire structure is level and adjust as necessary. Proper leveling prevents future structural issues and ensures smooth operation of doors and windows.
Keep in mind the orientation of your yurt; you might want to align the door with the best view or maximum sunlight. It’s at this stage that such adjustments are most easily made.
Once the lattice wall is in place, it’s ready to support the roof’s weight, ensuring your yurt begins to take shape as a sturdy, habitable structure.
Setting Up the Door Frame
Before launching into the door frame setup, ensure your platform is level and stable as any discrepancies might affect the door operation. Measure carefully, centering the frame on the platform to distribute weight and tension evenly.
Begin by assembling the door frame according to the manufacturer’s instructions—most kits will include prefabricated pieces that slot or screw together. Secure the frame to the platform, typically involving brackets or heavy-duty fasteners that can anchor into the wood.
To integrate the frame with the lattice wall structure, connect the top of the door frame to the adjoining lattice sections. This may require additional hardware or lashing depending on your specific kit. It’s crucial that the frame is flush with the lattice work to avoid gaps.
Confirm that the frame remains square and straight. A properly installed door frame not only offers a firm entry point but also supports the overall integrity of your yurt, so take your time with this step. Once the frame is solidly in place, check that the door swings freely and securely. Adjustments might be necessary to ensure a snug fit and smooth operation. This foundational step sets the stage for rafters and the application of the yurt cover, the latter enveloping your door frame as part of the integrated yurt structure.
Installing Rafters and Compression Ring
As you begin to set rafters into position, ensure they’re spaced evenly around the top of the lattice walls. At the lattice’s apex, each rafter will connect to the central compression ring—a circular piece that simultaneously supports and is upheld by the rafters, creating a sturdy and stable roof structure.
Keep the following in mind:
- Align each rafter correctly with both the ring and the corresponding point on the lattice wall for structural integrity.
- Secure the rafters firmly to the ring; this might require a helping hand as precision is key.
- Double-check that the ring remains level as you add each rafter, as an uneven ring can lead to potential issues with stability and aesthetics.
- Remember that the compression ring acts as the yurt’s crown, distributing the load evenly across the structure, so give it the attention to detail it deserves.
Securing the Yurt With Cable or Strapping
Once the yurt’s foundational frame is in place, addressing stability is crucial. To prevent your yurt from succumbing to wind lift or shifting, a high-tensile aircraft cable or heavy-duty strapping must encircle the structure. This is often referred to as a tension band and is integral to maintaining the yurt’s circular shape and overall integrity.
- Measure the circumference of the yurt’s top, just below the roofline, and cut the cable or strap to this length plus a little extra for securing.
- Weave the cable or strapping through the holes provided at the top of the lattice walls. If your kit doesn’t include holes, they can be made using a drill.
- Tighten the cable or strap around the yurt until snug, but not so tight that it deforms the lattice walls. Tension should be evenly distributed.
- Use a cable clamp or a strapping tensioner to secure the ends. For a strap, a ratchet tensioner can help you achieve the correct tightness.
- Check the tension band periodically, especially after extreme weather events, and adjust as needed to ensure ongoing stability of your yurt.
Integrating a solid tension band effectively anchors your yurt, giving peace of mind and lasting resilience.
Insulating Your Yurt for Climate Control
Effective insulation is vital for creating a comfortable living environment within your yurt, regardless of the season. Reflective insulation, often made from layers of bubble wrap sandwiched between reflective surfaces, is a popular choice due to its ability to retain heat in the winter and reflect sunlight in the summer. Wool or hemp batting, natural and breathable materials, are excellent for maintaining a stable interior temperature without trapping moisture.
When insulating the walls, start from the bottom and work your way up to ensure a snug fit against the lattice framework. Consider adding insulation wraps that are specifically designed for yurts; these can be cut to size and secured with adhesive or mechanical fasteners.
For the roof, use thicker insulation materials to combat rising heat in the colder months. Many yurt dwellers install an additional thermal barrier along the interior of the roof to maximize heat retention.
Don’t overlook the floor—insulating this surface is crucial as it can be a significant source of heat loss. Rigid foam boards or insulated panels can be placed directly beneath your flooring material to create a warm barrier between the ground and your living space.
Last but not least, addressing air leaks is critical to maintaining your preferred climate. Use weather stripping around windows and doors to prevent drafts that could undermine your insulation efforts. By attending to these details, you’ll ensure your yurt is a cozy habitat throughout the year.
Applying the Cover
To shield your yurt from the elements, the outer cover must be robust and well-fitted. Begin by draping the roof cover over the frame, ensuring it’s evenly distributed before securing the edges. High-quality covers are typically made from durable, waterproof, and UV-resistant fabrics like polyester or canvas to withstand various weather conditions.
Next, wrap the wall cover around the lattice, starting from the door and moving around, attaching it to the roof cover with the provided fasteners—usually Velcro, laces, or hooks. Ensure no gaps are left where the roof and walls meet, as this could lead to water ingress.
For added insulation, reflective foil or felt liners can be placed beneath the cover, increasing energy efficiency and comfort. Seamlessly join the sections, and avoid wrinkles or bunching to maximize both thermal performance and visual appeal.
Finally, secure the base of the wall cover to the platform, typically with a heavy-duty band that might be screwed or bolted into place, achieving a tight seal that blocks drafts and pests. Always double-check the tightness and condition of the cover, as this is your yurt’s primary defense against weather.
Weatherproofing Your Yurt
Ensuring your yurt stands up to the elements is crucial for longevity and comfort. Here are effective weatherproofing measures:
- Seal seams: Use weather-resistant sealant on the outer cover seams to prevent leaks during rain.
- Protective coating: Apply a UV-resistant coating to the fabric to reduce sun damage.
- Door and window flashing: Install flashing above doors and windows to deflect rainwater away from openings.
- Skirt installation: Attach a heavy-duty skirt around the base to shield against wind and rain intrusion.
- Adequate overhang: Ensure the roof overhang is wide enough to prevent water runoff from entering the structure.
- Storm flaps: Equip windows and vents with storm flaps for extra protection during adverse weather.
- Snow and wind kit: In high-wind or snow-prone areas, add support with specialized kits designed to strengthen the yurt’s resistance.
Installing Windows and Skylights
Positioning windows and skylights enhances natural light and provides ventilation. Opt for double-paned windows for better insulation. Skylights should be carefully placed around the yurt’s crown to maximize the entry of sunlight without compromising the structural integrity. Consider retractable covers for regulating light and temperature.
During installation, ensure seals and trims are waterproof to prevent leaks. For windows, select frames that match the yurt’s aesthetic and can withstand its unique curvature. Always follow manufacturer instructions to maintain warranty and optimize performance.
Crafting the Interior Space
Maximize the circular layout by situating furniture and storage units along the perimeter walls. This approach maintains an open central area for social activities and movement, taking advantage of the natural flow of a yurt.
Implement multi-functional furniture to utilize space efficiently. Items such as a sofa bed or an ottoman with storage can serve multiple purposes, providing both comfort and functionality without cluttering the space.
Choose lightweight and easily movable pieces to allow for quick reconfiguration of the living area. This flexibility enables the space to adapt to various needs and occasions.
Install custom-built shelves and cabinets that conform to the yurt’s curvature. This ensures a seamless integration of storage solutions that complement the structure’s unique shape.
Opt for a minimalist design approach to keep the interior feeling spacious and uncluttered. Select essentials that enhance the living experience, avoiding excess that could overwhelm the space.
Incorporate vertical space for plant hangers or suspending decor. This not only adds a decorative touch but also makes use of the air space without impacting the floor area.
Employ a loft space under the dome if height allows, creating an elevated bedroom or lounge area. This additional level adds dimension to the interior and maximizes the available space within the yurt’s footprint.
Remember to consider the natural light entering through windows and any central skylight. Arrange the interior to harmonize with the daylight patterns, creating an energizing environment during the day and a cozy atmosphere in the evening.
Electrical and Plumbing Considerations
To integrate electrical wiring, opt for surface-mounted conduit. This prevents altering the yurt’s structural integrity and maintains a seamless aesthetic. Choose an entry point for your electrical source, generally where the platform meets the lattice wall, to minimize exposure.
For lighting, consider energy-efficient LED fixtures or solar-powered options. They are eco-friendly, reduce energy consumption, and are well-suited for remote yurt locations.
When adding plumbing, prioritize compact fixtures to maximize space. A split system, with water coming from a central bathhouse or utility area, can simplify the installation process. If connecting to a septic system is not feasible, composting toilets offer an eco-friendly alternative.
Greywater systems can be equipped for sinks and showers, allowing water reuse for irrigation. This reduces the ecological footprint and aligns with the sustainable ethos of yurt living.
Always consult a professional electrician or plumber to ensure compliance with local codes and to maintain safety throughout your yurt home.
Maintaining Your Yurt for Longevity
To ensure your yurt remains in prime condition for years to come, follow these maintenance tips:
1. Regular Inspections: Biannually, check the fabric, lattice walls, and roof for any signs of wear, such as tears or loose fittings that may need repair or tightening.
2. Clean the Canvas: Gently wash the exterior with mild soap and water to remove dirt and prevent mildew. Avoid harsh chemicals that can damage the fabric.
3. Protect the Wood: Treat wooden components annually with a quality sealant to guard against moisture and insect damage.
4. Monitor for Mold: Keep an eye out for mold and mildew inside the yurt, especially in damp climates, and address any growth immediately to maintain air quality.
5. Tend to the Dome: Ensure the skylight or dome remains clear of debris and operates smoothly to maintain proper ventilation.
6. Secure from Elements: Before harsh weather arrives, double-check that your yurt is securely anchored and that any storm flaps are properly fastened.
By adhering to these guidelines, you’ll help your yurt stand the test of time and provide a comfortable, sustainable living space year-round.
FAQ
How much does it cost to build a yurt?
The average cost to build a yurt is approximately $35,000, with a range varying between $11,500 to $75,000.
What are the disadvantages of a yurt?
The main disadvantages of a yurt include limited storage and living space, along with potential issues around plumbing and electrical hookups.
What is the average lifespan of a yurt?
The average lifespan of a yurt is approximately 13 years, although this can vary widely depending on factors such as UV exposure, heat, cleanliness, and maintenance procedures.
Are yurts hard to build?
Building yurts is not typically difficult, but it does require some general carpentry skills; beginners are often advised to use a yurt kit for ease.
What kind of materials are required for constructing a yurt?
To construct a yurt, materials needed include a durable weather-resistant fabric for cover, wooden or bamboo frameworks for the circular structure, a crown or compression ring for the top, lattice walls, and door frame and cover.
Can a yurt withstand extreme weather conditions like heavy snow or high winds?
Yes, a properly constructed and maintained yurt can withstand extreme weather conditions, such as heavy snow and high winds, due to its circular design and durable materials.
What are the essential steps in the maintenance of a yurt?
The essential steps in the maintenance of a yurt include regular cleaning, inspecting the canvas for damages, tightening tension bands, timely repair and replacement of parts and providing adequate ventilation to prevent moisture buildup.
Related reading:
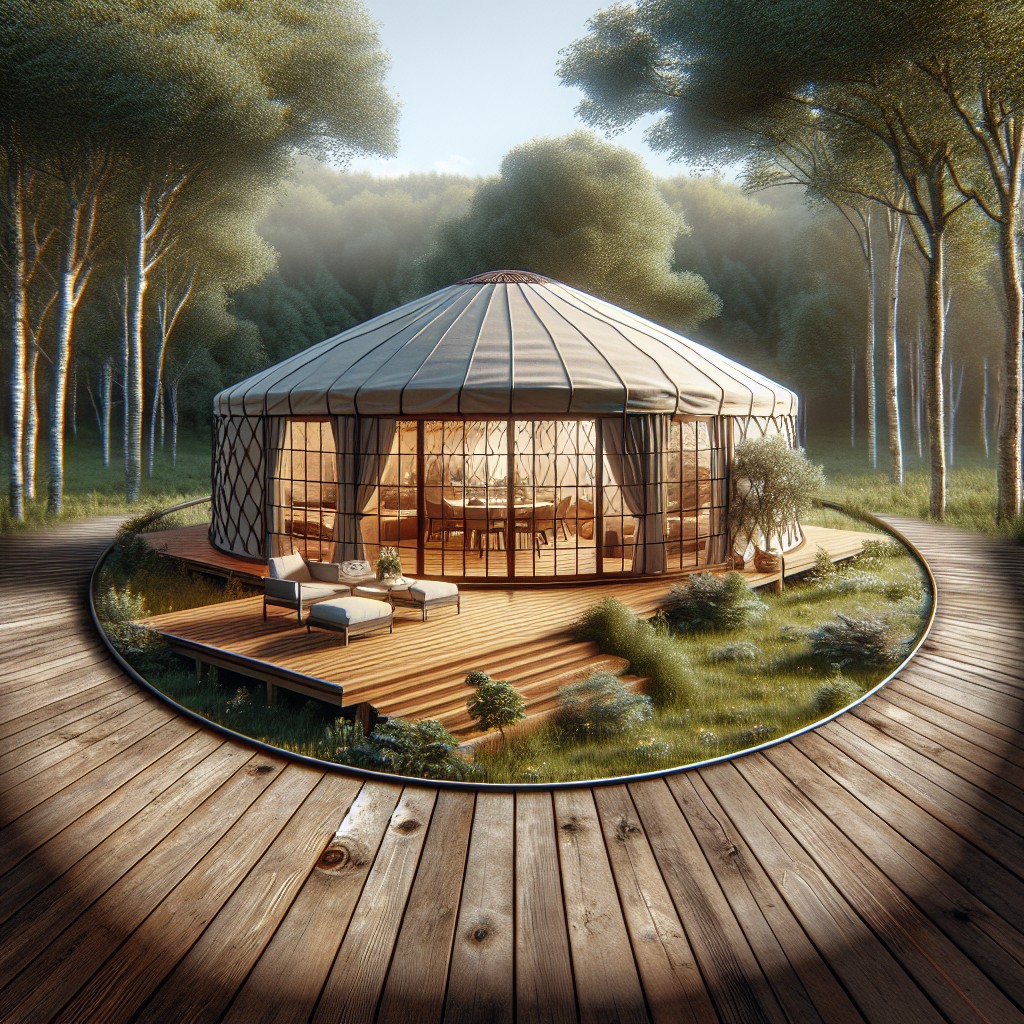

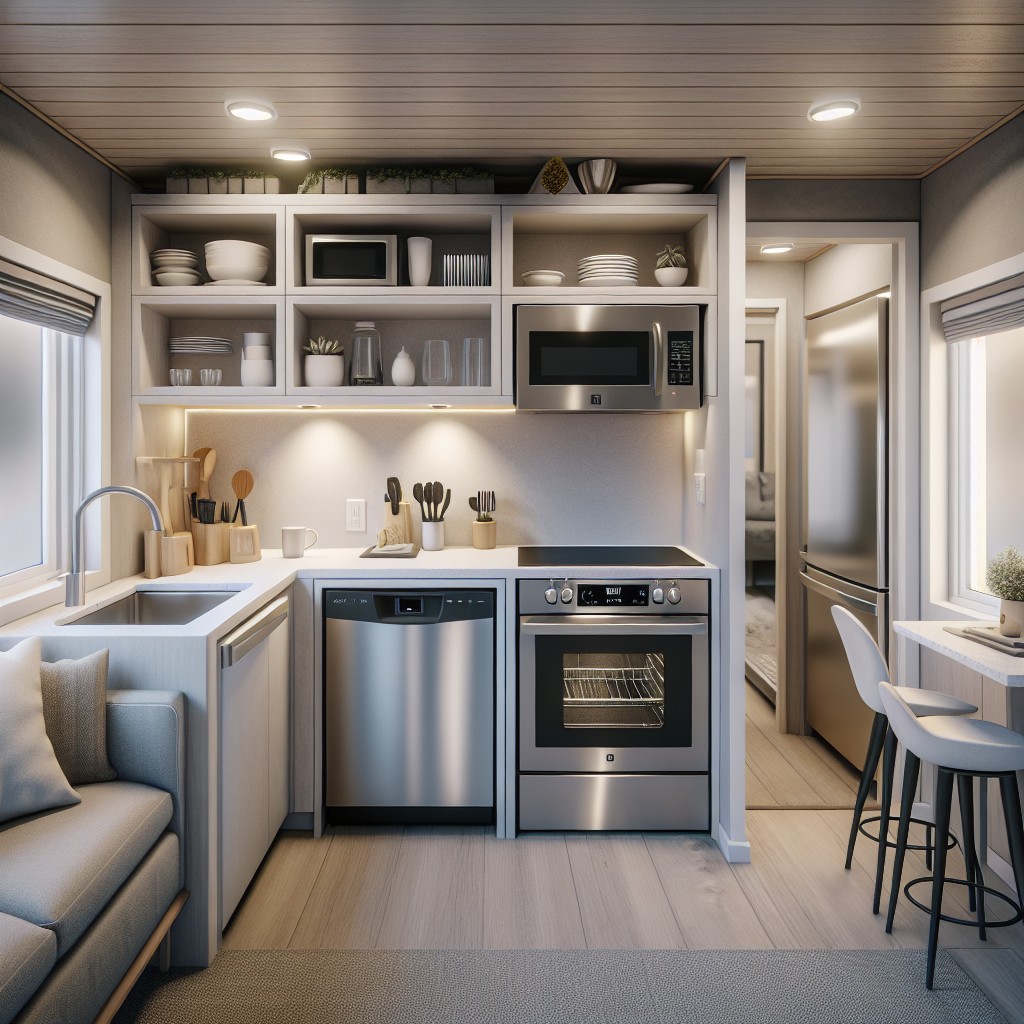


Table of Contents