Last updated on
Yes, you can install drywall in a mobile home, making sure to use screws instead of nails for added stability and improved durability.
Absolutely, you can install drywall in a mobile home! Replacing mobile home panels with drywall can significantly improve the home’s appearance and overall insulation compared to standard mobile home panels. It’s a popular renovation choice that creates a fresh, new interior and enhances the home’s comfort.
Whether you’re planning a complete makeover or just replacing a single wall, this guide provides all the essential steps and tips to ensure a successful drywall installation in your mobile home.
Key takeaways:
- Assess structural integrity before installing drywall in a mobile home.
- Understand the specifics of mobile home construction for successful installation.
- Prepare the mobile home by removing existing wall material and reinforcing studs.
- Follow the steps of measuring, cutting, and hanging the drywall panels.
- Finish the drywall by taping joints, covering screw indentations, and sanding for a smooth surface.
Assessing the Structural Integrity of the Mobile Home
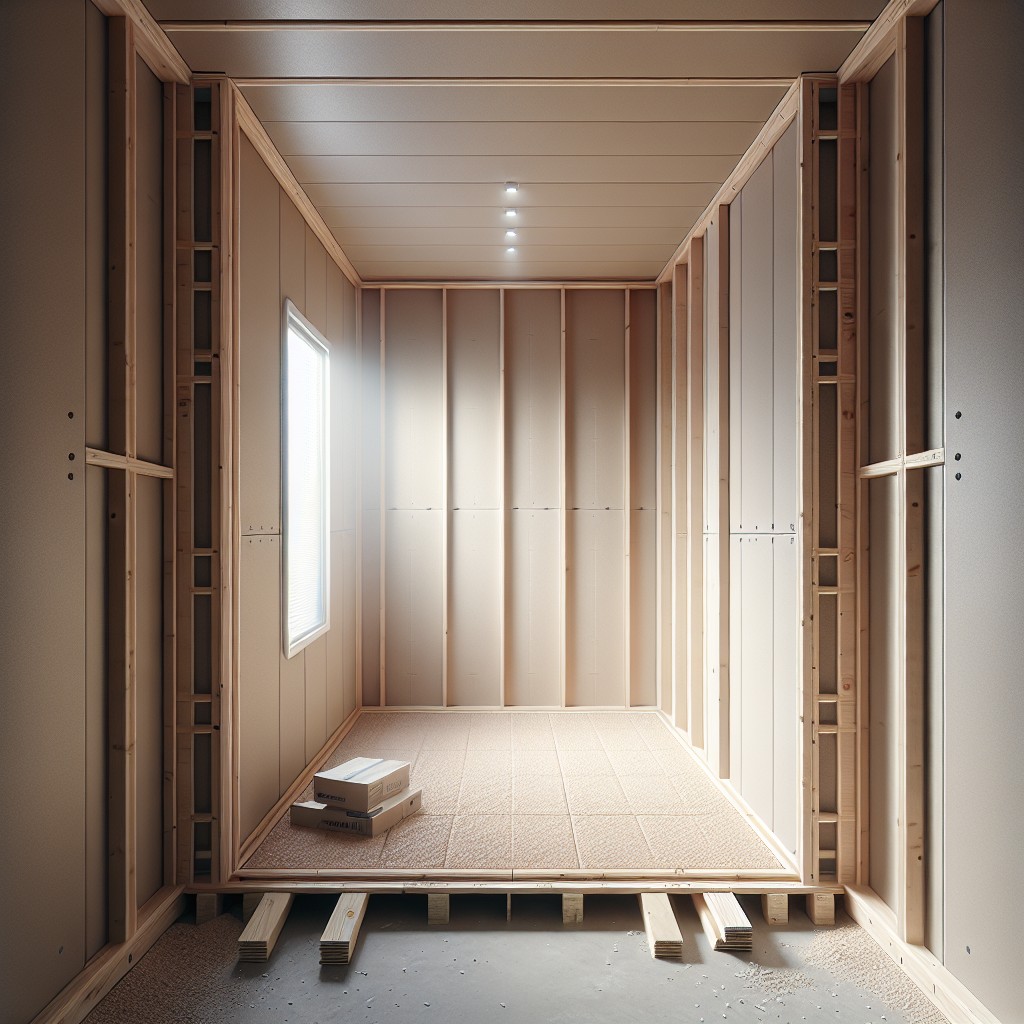
Before embarking on a drywall project in your mobile home, it’s crucial to evaluate the structural foundation. This process involves checking the stability of the walls to ensure they can support the weight of drywall, which is heavier than typical mobile home paneling.
Start by inspecting the walls for any signs of damage, such as warping, moisture build-up, or mold. Sturdy studs are essential, as they provide the framework to which the drywall will be anchored. Utilize a stud finder to confirm their spacing; in many mobile homes, studs are spaced further apart than in traditional homes.
Also, consider the insulation in your walls. Adding drywall can affect temperature regulation, so it’s important to understand whether additional insulation will be necessary for energy efficiency.
Lastly, take the time to inspect the flooring and ceiling condition. Any sagging or instability could indicate deeper structural issues that need to be resolved before proceeding with the installation of drywall. Addressing these aspects ensures a solid base for your renovation, ultimately leading to a successful upgrade to your living space.
Understanding the Specifics of Mobile Home Construction
Mobile homes typically feature a lighter construction than traditional houses, with wall studs made of wood or metal that are often spaced further apart. The mobility of these homes requires that materials used are lighter and more flexible to handle the stress of transport. Additionally, the interior walls are usually thinner, and instead of the standard drywall used in stationary homes, mobile homes often come with wall panels that have vinyl or wallpaper-like coatings.
Wall panels in mobile homes are often secured to the studs with staples or small tacks which makes them less permanent and easier to remove than drywall, which is screwed or nailed into place. The electrical wiring and insulation may also differ, with mobile homes sometimes utilizing thinner insulation and electrical setups that are designed for easier access and lower power demands.
Understanding the construction of your mobile home is crucial for a successful drywall installation, as it will influence the type of drywall you choose, the installation method, and the type of fasteners you’ll need to secure the drywall properly without compromising the structure.
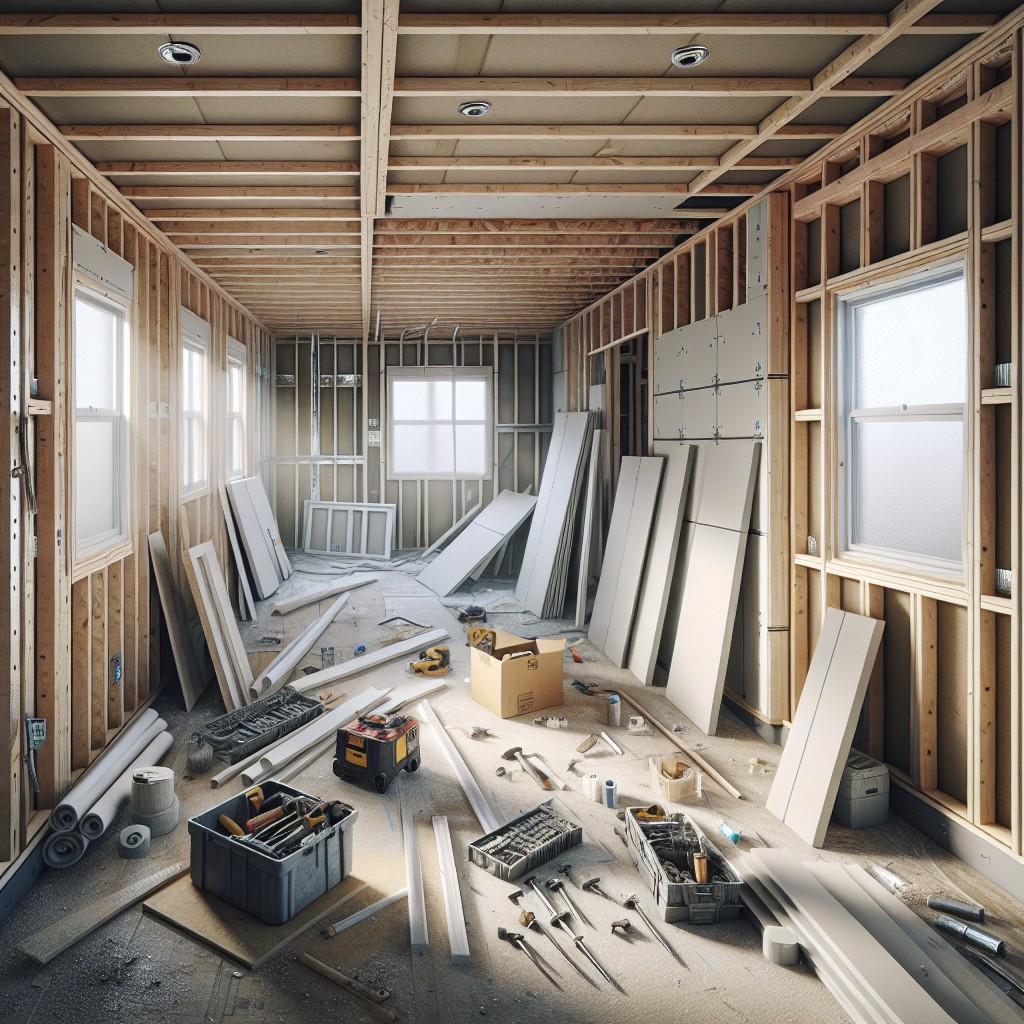
Preparing the Mobile Home for Drywall Installation
Before diving into the drywall installation process, it’s crucial to ensure your mobile home is ready for the new addition. Take the following preparatory steps to create a sound environment for your drywall:
1. Remove Existing Wall Material: Carefully strip off any old paneling or wall coverings. Inspect for mold or water damage and address any issues before proceeding.
2. Strengthen Wall Studs: Ensure the existing studs are sturdy. If they exhibit any movement, reinforce them with additional lumber for a firmly anchored base.
3. Address Insulation Needs: If you’re removing old wall material, consider upgrading insulation to improve energy efficiency. Install insulation batts between the studs if needed.
4. Install Moisture Barrier: In locations prone to humidity, installing a vapor barrier before the drywall can help prevent future moisture problems.
5. Smooth the Surface: Remove any protruding nails or screws. The wall studs should have a smooth, even surface to prevent bumps under the drywall.
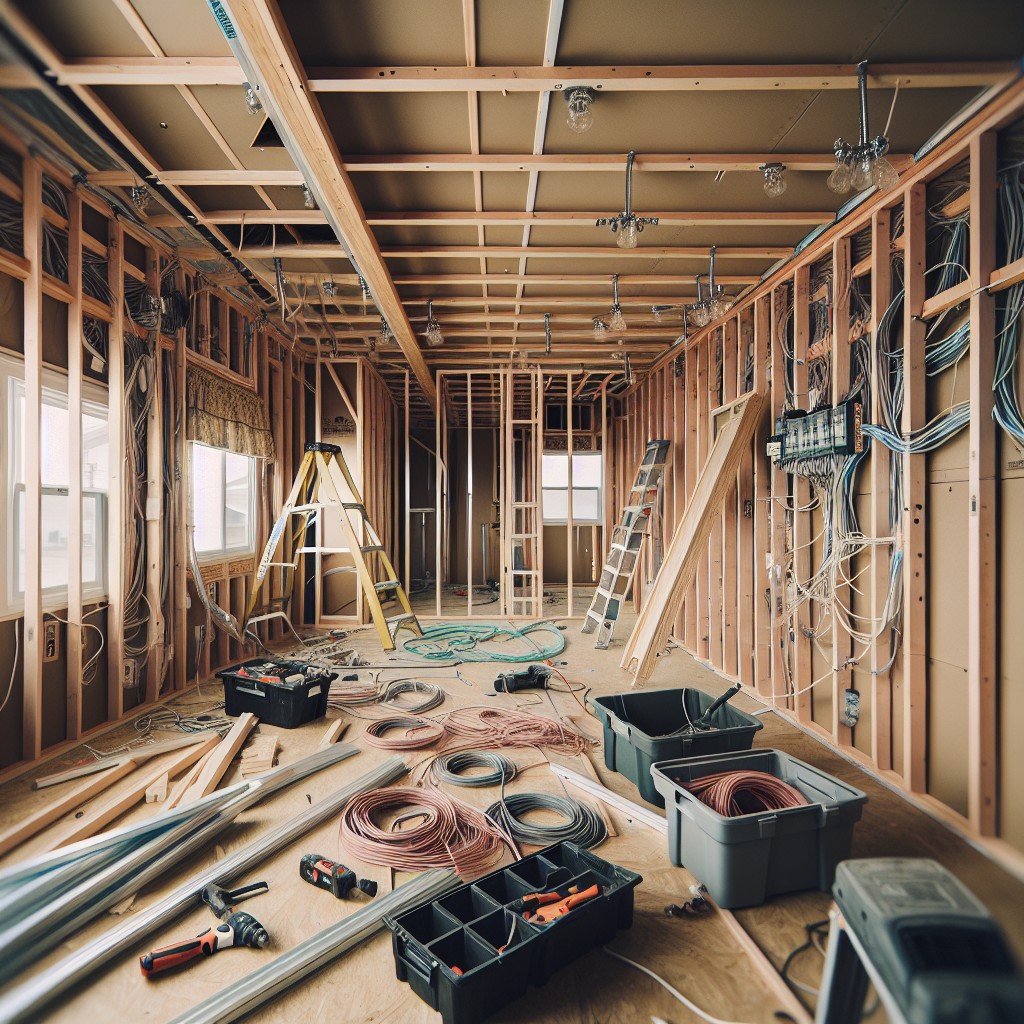
6. Electrical and Plumbing Check: Verify that electrical wiring and plumbing are properly installed and meet code requirements, as these will be harder to access once drywall is up.
7. Plan for Outlets and Fixtures: Mark the locations of outlets, switches, and light fixtures for accurate cutouts in the drywall.
8. Gather the Right Tools: Make sure you have all necessary tools on hand, including a drywall saw, drill, tape measure, and T-square, to ensure efficiency when you start the installation.
By thoroughly preparing, you’ll set the stage for a smoother installation process and better end results.
Steps to Hanging Drywall
Begin by measuring the wall space where the drywall will be installed. Use a tape measure to get precise dimensions, ensuring that the drywall sheets will fit perfectly on the walls of your mobile home.
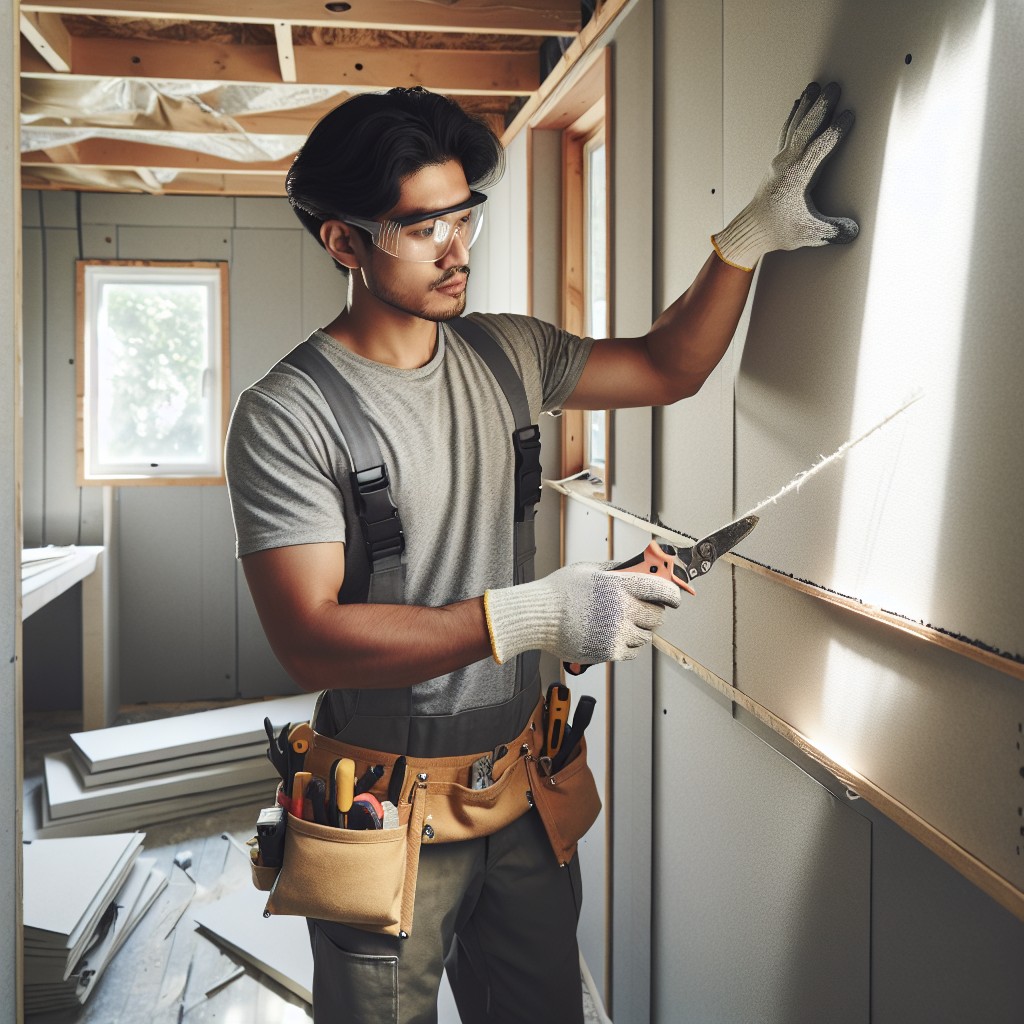
Proceed to cut the drywall panel to size, keeping in mind that accuracy here is key. Utilize a T-square and a utility knife to score the drywall, snapping it cleanly along the scored line.
Next, position the first panel against the wall studs or framing, starting from the top corner. It’s important to align the edges with the center of a stud to provide a solid base for fastening.
Fasten the panel to the wall using drywall screws. Drive the screws into the studs, approximately every 8 inches along the edge and every 12 inches in the field of the panel. Make sure the screws are slightly countersunk without breaking the paper face of the drywall.
After the top panel, measure and hang the next upper panels, maintaining a tight seam between the pieces. Check that each piece is secure along the framing for a sturdy fit.
When you reach outlets, switches, or any fixtures, carefully measure and mark their locations on the drywall. Cut out these areas with a keyhole saw to ensure panels fit cleanly around these obstructions.
Continue with fitting the lower panels, following the same process for measuring, cutting, and fastening as with the upper panels. Ensure the bottom edge is aligned and sits snugly against the floor or the trim base, without applying excessive force that could buckle the drywall.
Step 1: Measure & Cut
Begin by taking precise measurements of the wall area where the drywall will be installed. Use a tape measure to determine the height and width needed for each panel. It’s essential to account for any irregularities in the wall or obstacles like windows and doors.
For accuracy, transfer these measurements onto your drywall sheets, marking with a T-square for straight lines to guide your cuts. Ensure your markings are clear and visible.
With a utility knife, score along the marked lines on the drywall’s paper facing. Apply enough pressure to cut through the paper but not so much as to break the gypsum core unnecessarily.
Snap the scored section by firmly pressing from the opposite side. This action will break the drywall sheet cleanly along the scored line.
Run the utility knife on the opposite paper backing to separate the pieces entirely, taking care to maintain the integrity of the cut edges. This will ensure a snug fit when installing the panels.
For precision cuts, especially around electrical outlets or unique angles, use a jab saw. The key is to cut pieces that fit as accurately as possible to minimize the need for excess joint compound and to create a smooth finish.
Step 2: Hang Panel
Begin by positioning the first drywall panel along the top corner of the wall, ensuring it remains level. It’s essential to start from the top when hanging drywall on walls. If working alone, a drywall lift or jack can be invaluable to support the weight of the panel.
Gently press the panel against the studs, confirming that the edges align with the center of the studs to provide a sturdy anchor for screwing. For ceilings, enlist the help of an assistant or a lift; the panel should be snug against the joists.
While holding the panel firmly in place, insert drywall screws at the corners to temporarily hold it. Continue to affix screws every 6 to 8 inches along the studs or joists, starting in the center of the panel and working outward. This method prevents the drywall from bowing or creating unnecessary stress that can lead to cracks later on.
Make sure that screws are driven just below the surface of the board to ensure a smooth finish, but be cautious not to break the paper face of the drywall, as this can affect the integrity of the hold.
Step 3: Fasten Panel
Securing the drywall panel to the wall studs is crucial for stability. Use drywall screws, spaced approximately 7 inches apart along the studs. Start fastening screws from the center of the panel and work your way outwards to avoid bowing. Ensure screws are driven slightly below the surface of the drywall creating a dimple without breaking the paper facing; this will make for easier finishing later. Employ a drywall screw gun or a drill with a drywall bit for consistent results. Remember, the goal is a secure attachment that lays the groundwork for a smooth, unblemished finish.
Step 4: Fit Upper Panels
Once the upper section of the wall is prepared, fitting the panels correctly is crucial to ensure a clean finish and avoid future issues. Begin by lifting the panel to the top of the wall, close to the ceiling. It’s often best to work with a partner for this step to maintain stability and alignment. If the panel doesn’t fit perfectly, don’t force it; instead, trim it carefully to size using a drywall saw or utility knife for an exact fit.
Ensure the panel edge aligns with the center of a stud, providing a secure anchoring point for the drywall screws. This will also make it easier when adjoining panels are installed, as they’ll share the same stud for fastening. Check that the panel is level before fastening, as any misalignment here can affect the entire room.
Use a drywall lift if available, especially for ceiling panels, to simplify fitting and reduce physical strain. Once the panel is in place and level, proceed to securing it with screws spaced about 7 inches apart along the studs. Remember to sink the screws slightly below the drywall surface without breaking the paper face, to prepare for seamless taping and mudding.
Step 5: Cut Around Outlets
To cut around outlets with precision:
1. Measure the location of the outlet on the wall and transfer these measurements to the drywall panel. Ensure accuracy to prevent gaps that could undermine energy efficiency and aesthetics.
2. Use a dry keyhole saw to plunge into the drywall at the marked spot, then saw around the perimeter of the outlet, adhering to your measurements. A steady hand will result in clean lines.
3. Test the cut by aligning the drywall panel with the outlet. If adjustments are needed, it’s better to trim cautiously; you can always remove more material, but you cannot replace what has been cut away.
4. Once the drywall piece fits perfectly around the outlet, proceed with hanging and securing it.
Remember to turn off the electricity to the outlets before handling the panels to ensure safety.
Step 6: Fit Lower Panels
After successfully placing the upper panels, it’s time to focus on the lower sections of the wall, which require precise fitting to align seamlessly with the already established upper drywall. Approach this step with attention to detail to ensure a polished look and strong support:
- Measure the remaining wall space from the bottom of the upper panels to the floor, accounting for any slopes or irregularities in the mobile home’s construction.
- While cutting the lower panels, remember to subtract the thickness of any flooring that might be installed later, to avoid the drywall resting on the floor, which could lead to moisture damage.
- Double-check the placement of electrical outlets, switches, and any other fixtures to create accurate cutouts in the panels before installing.
- Slide the lower panels into position, gently nudging them against the upper panels without forcing, to maintain the integrity of both pieces.
- Secure the panels with screws, starting in the center and working your way to the edges to minimize the potential for warping or bowing.
Finishing the Drywall
Once your drywall is securely hung, the finish work begins to make the walls look smooth and cohesive. This involves taping over joints, covering screw indentations, and sanding surfaces until they’re ready to be primed and painted.
– Non-tapered joints, where two flat ends meet, need to have joint tape applied with a thin layer of joint compound, commonly known as mud. Once dried, it requires another application of mud, feathering out the edges to reduce visibility.
– Tapered joints, where the tapered edges of drywall panels meet, allow for a smoother finish. Apply mud into the taper, lay in the tape, and apply another thin layer over the top. Feather the edges to integrate the joint with the surrounding drywall.
– Standalone screw indentations must be covered with a small dab of mud using a putty knife. Ensure it’s flush with the panel surface as this prevents flashing or textural differences after painting.
During the finishing steps, patience is key:
– Apply a second coat of joint compound over all taped joints and screw indentations. Allow it to dry thoroughly, typically overnight, before proceeding.
– Sand the dried compound using a fine-grit drywall sanding pad. Aim for a smooth, even surface, taking care not to sand down into the paper layer of the drywall. Subsequent primer and paint will reveal any imperfections, so take the time for a thorough job.
– Inspect your work under strong lighting at different angles to spot any areas that may need additional attention. Spot fix where necessary, and after a final sanding, your walls are ready for the finishing touches of primer and paint.
Non-tapered Joint
When dealing with non-tapered joints, careful attention is needed since these joints do not have the recessed edges found in tapered drywall panels. Applying joint compound and tape to these edges is slightly different, and proper technique is crucial to create a smooth, invisible seam.
Here are some tips to ensure a professional finish:
- Use a liberal amount of joint compound (mud) when filling in non-tapered joints to create a flat surface.
- Apply mesh tape over the mud on the joint, as it allows for more flexibility and better adhesion on flat seams.
- Feather the mud out wide on both sides of the joint to help blend the seam into the surrounding wall. This may require several coats, with each extending further out from the last.
- Sand the area smooth between coats when the mud is completely dry. This is essential for achieving an even surface that won’t be noticeable once painted.
- Be patient if extra layers are needed. Non-tapered joints can be more challenging to hide than tapered ones, so additional coats and sanding may be necessary.
These points guide through the tricky process of finishing non-tapered joints in your drywall project, ensuring a smooth wall surface.
Tapered Joint
When dealing with a tapered joint, you’re engaging with the thinner, long edges of drywall panels designed to facilitate seamless joining. Here’s what you need to know:
- These recessed edges create a natural “valley” when two panels meet, making it ideal for taping and joint compound.
- Applying joint compound into this valley fills it flush with the wall surface, ensuring a smooth finish after sanding.
- Feathering out the compound over the taper can help in achieving a flat, invisible seam.
- It’s important to keep the compound thickness consistent to avoid bulges or unevenness once dried.
Screw Indentations
When installing drywall, it’s essential to properly seat your screws without breaking the surface paper. Aim for a slight dimple that allows space for joint compound. Use coarse-threaded screws specifically designed for drywall for the best grip. Space them about 16 inches apart along studs and 12 inches on ceilings. Be consistent with screw depth using an adjustable screw gun, as inconsistent depths can make mudding more challenging and less uniform. Avoid overtightening to prevent damage to the drywall and ensure a smooth finish.
Finishing Steps
Apply the second coat of joint compound, feathering edges to create a smooth, inconspicuous transition. Allow it to dry thoroughly. Once dry, inspects for any imperfections or areas that may need additional compound and apply as necessary.
Sand the dried compound with fine-grit sandpaper or a sanding sponge to achieve a smooth finish. Focus on blending the seams and feathering the edges into the surrounding drywall to obscure any lines.
If any bumps or ridges appear during sanding, lightly reapply joint compound, let dry and re-sand the area. The goal is to have a flat and smooth surface that’s indistinguishable from the rest of the wall or ceiling once painted or covered with wallpaper.
Step 1: Second Coat
After the initial layer of joint compound has thoroughly dried, it’s time to apply a second coat. This layer is crucial for creating a smooth, seamless surface and covering any imperfections missed by the first round.
Ensure that the first coat is sanded down before applying the second to avoid bumps and ridges. Apply the second coat wider than the first to blend the joint compound seamlessly into the wall. This process helps to prevent the appearance of seams after painting or texturing the walls.
Let the second coat dry completely, usually for 24 hours, before proceeding with sanding. Smooth application with a wide-joint knife and consistent thickness across the surface are key for achieving professional-looking results.
Step 2: Sand
Once the second coat of joint compound dries, it’s time to smooth out any imperfections to prepare for painting or wallpapering. Lightly sand the dried compound using a fine-grit sanding sponge or sandpaper. Focus on feathering the edges where the compound meets the drywall, aiming for a seamless transition.
To minimize dust, use a sanding sponge slightly dampened with water or a drywall sanding screen. Move in a circular motion and avoid over-sanding, which can create divots or remove too much compound. If you notice low spots or imperfections, apply another thin coat of compound, let it dry, and sand again. Remember to wear a dust mask and eye protection while sanding to safeguard your health.
Materials You Will Need
To ensure a successful drywall installation in your mobile home, having the right materials on hand is paramount. Here’s a comprehensive checklist:
- Drywall panels: Choose the appropriate thickness― generally, 1/4″ for curved surfaces and 1/2″ for walls and ceilings.
- Drywall screws: Select the correct length; 1-1/4″ screws typically suffice for installing drywall to wood framing.
- Joint tape: Opt for paper tape to reinforce seams or self-adhesive mesh tape for ease of use.
- Joint compound: Also referred to as ‘mud,’ this is essential for sealing joints and smoothing over screw heads.
- Corner beads: These are required for outside corners to provide a clean, sharp edge.
- Drywall saw: A key tool for cutting panels to size, especially around electrical outlets and switches.
- Utility knife: Ideal for scoring drywall for snap-off cuts.
- T-square: Crucial for marking straight, accurate cutting lines.
- Screw gun or drill with a drywall bit: This will help set screws at the correct depth without breaking the paper surface.
Having these materials at your disposal facilitates a smoother workflow, ensuring your drywall project is not just functional but also delivers a polished finish.
Which Drywall Is Best for Mobile Home Ceilings?
Selecting the right drywall for your mobile home ceiling involves considering weight, thickness, and flexibility. Here are key points to guide your choice:
- Lightweight drywall is ideal due to the structural limitations of mobile homes. Look for half-inch thick panels which offer a good balance between durability and weight.
- For higher ceilings or where extra insulation is required, consider using 5/8-inch type X drywall, which has fire-resistant properties.
- Some manufacturers offer sag-resistant drywall, which is specifically designed to prevent sagging in ceiling applications.
- Flexibility can be important for accommodating the subtle movements of a mobile home. Thinner drywall can be more pliable and less likely to crack under stress.
- Ultimately, ensure the drywall selected complies with the HUD Code for mobile home construction.
Always consult with a professional if you’re unsure which product would work best for your situation.
How to Hang Drywall On a Mobile Home Ceiling
Before beginning, ensure the mobile home’s framing can support the drywall, as it is heavier than traditional ceiling panels.
1. Locate Ceiling Joists: Use a stud finder to locate the joists in the ceiling. This provides a secure anchoring point for the drywall sheets.
2. Choose Lightweight Drywall: Opt for 1/4-inch or 3/8-inch thick drywall for the ceiling to ease installation and reduce strain on the structure.
3. Plan Your Layout: Position the drywall sheets perpendicular to the joists. The fewer seams there are, the stronger your ceiling will be.
4. Cut to Size: Measure and cut the drywall to fit the space, accounting for fixtures like lighting.
5. Enlist Help: Drywall is cumbersome, so have an assistant or use a drywall lift to hold the panels in place during installation.
6. Start in the Corner: Begin hanging sheets from the corner of the ceiling to minimize the number of cuts required.
7. Apply Adhesive: If desired, apply construction adhesive to the joists to help secure the drywall before screwing it in.
8. Secure with Screws: Attach the drywall to the joists with screws, keeping them 16 inches apart and 1/2 inch from the edges, driving them just below the surface.
9. Stagger Seams: As you move across the ceiling, stagger the drywall sheet ends to increase the overall strength of the ceiling’s surface.
Always check for level and straightness as you progress, and remember that the finishing process will cover screw indentations and seams for a smooth appearance.
FAQ
Will drywall crack in a mobile home?
Yes, due to the transportation process, drywall in mobile homes often experiences cracking.
What is the best drywall for a mobile home?
The best drywall for a mobile home is the Vinyl Over Gypsum (VOG) due to its lightweight, simple installation, and its capability of concealing seams with floor-to-ceiling strips.
How thick is drywall in a mobile home?
The thickness of drywall in a mobile home typically ranges from 5/16” to ½”, with 3/8” now being the most common for new homes.
Can you replace paneling with drywall in a mobile home?
Yes, you can replace the paneling with drywall in a mobile home, however, be aware that removing the original paneling may cause it to become damaged and unusable.
Are there specific techniques to install drywall in a mobile home?
Yes, installing drywall in a mobile home typically involves cutting it to fit the wall dimensions, applying adhesive to the back, screwing it into studs, and then finishing with joint compound and paint.
How does climate affect the durability of drywall in a mobile home?
Climate greatly impacts the durability of drywall in a mobile home, as extreme weather conditions such as high humidity and temperature swings can cause it to warp, rot, or develop mold over time.
What are some of the challenges encountered when installing drywall in a mobile home?
Installing drywall in a mobile home can be challenging due to factors such as limited space, structural instability, problematic insulation, and issues with transportation and installation process.
Want More?
 40 Luxury Dream Houses That Will Transform Your Life
 20 Modern House Front Gate Design Ideas for Ultimate Curb Appeal
 20 Stylish Modern House Entrance Door Ideas
 20 Brilliant Ideas for Modern House Elevation Design
 20 Ideas: Modern House Entrance
Table of Contents